
Choosing Magnetic Track Lighting is not just a matter of selecting attractive fixtures. The right system must suit the room, support the intended tasks, and allow useful adjustment over time. A slim track above a kitchen island, for example, needs focused light without harsh glare on polished counters. Small details matter.
The International Energy Agency estimates that lighting uses about 15% of global electricity and produces roughly 5% of global greenhouse gas emissions. The U.S. Department of Energy reports that LEDs use at least 75% less energy than incandescent bulbs and can last up to 25 times longer. These figures make efficiency worth checking, but they do not tell the whole story. Color quality, beam angle, dimming compatibility, and driver performance also shape how a space feels.
Lighting designer Randall Whitehead has described lighting as “the jewelry of the home.” Magnetic Track Lighting can make that idea practical: movable heads and compatible pendants let you redirect light as a room’s needs change. Yet flexibility has limits. Track standards, voltage, and fixture compatibility vary, so a component that looks right may not fit the system. Before choosing, compare the track type, light output, color temperature, and warranty, then consider how the room is actually used. A showroom can flatter a product. Your own ceiling may tell a different story.
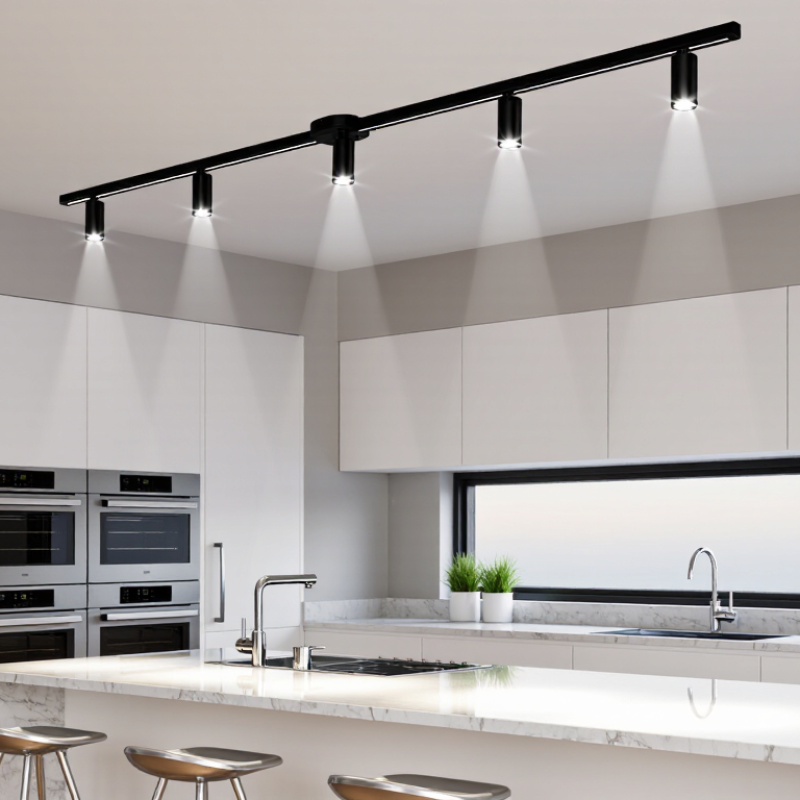
Magnetic track lighting combines a powered rail with movable light modules. In many systems, a driver converts mains electricity into low-voltage direct current, often 48 volts. Conductive strips inside the rail carry power; magnets hold each module in place. The magnet usually provides the grip, not the electrical connection. Small contact points do that work.
This separation makes repositioning practical. Slide a spotlight along the rail, or remove it and attach it elsewhere, without rewiring the ceiling. Still, the feel of the connection matters: a module should sit firmly, with its contacts aligned and no visible flicker. Designs vary, so check the specified voltage, driver capacity, and compatibility before adding fixtures. A tidy rail can hide a mismatch.
The efficiency benefit comes mainly from the LEDs, not the magnets. The U.S. Department of Energy reports that LEDs use up to 90% less energy and can last up to 25 times longer than incandescent bulbs. The International Energy Agency estimates buildings use about 30% of global final energy. Those figures make efficient lighting relevant, but they do not guarantee savings in every room. Too many bright modules can still waste energy. Measure the space, then test the beam on a real surface. Sources: U.S. Department of Energy, “LED Lighting”; IEA, “Energy Efficiency 2023.”
Magnetic track systems commonly use 48 V DC, supplied by a compatible driver that converts mains power. Conventional track systems commonly operate at mains voltage, such as 120 V in North America or 230 V in many other regions. Check the track, driver, and fixture specifications together before choosing a system.
Before choosing magnetic track lighting, map what each area must do. Measure the room, ceiling height, and key surfaces, then note where shadows fall at different times of day. A kitchen island needs focused light for chopping; a living-room wall may need softer, adjustable light for reading or displaying art. Small detail, big difference. Track heads can be repositioned, but they cannot fix a poorly planned layout by themselves.
Estimate the light needed for each task, rather than relying only on fixture wattage. The Illuminating Engineering Society’s Lighting Handbook provides task-based guidance because suitable light levels vary by activity and visual conditions. Check the product’s lumen output, beam angle, dimming compatibility, and color temperature; a narrow beam can leave the edges of a desk dim. For energy planning, the U.S. Department of Energy’s Energy Saver guidance says LEDs use at least 75% less energy and can last up to 25 times longer than incandescent bulbs. That comparison is useful, though actual savings depend on use and system design. I’d still test a sample head in the room: paint colors and glossy counters can make a neat plan feel wrong.
Magnetic track lighting works best when the track, power supply, and fixtures are treated as one system. Check the track’s rated voltage and maximum load before choosing lights; many systems use low-voltage power, but specifications vary. A 2-meter track may look simple on paper, yet several high-output fixtures can exceed the driver’s capacity. Leave some headroom. Also confirm that connectors and feeds match the track profile, especially when planning corners or multiple sections.
Fixture specifications shape both the look and usefulness of the room. Compare lumens for brightness, beam angle for spread, and color temperature for mood. A narrow beam can highlight a framed print, while a wider beam suits a kitchen counter. For accurate color, look for a high color-rendering index, particularly near clothing, food, or artwork. Dimming needs attention too: the driver, fixtures, and control must be compatible. This is easy to overlook. I would not choose by wattage alone; it indicates energy use, not how much useful light reaches a work surface. Some specification sheets still leave questions, so verify the dimming range and fixture compatibility before ordering.
| Specification | Magnetic Track | Fixture | Light Output | What to Check |
|---|---|---|---|---|
| Electrical system | Common systems use 24 V or 48 V DC tracks. | Fixtures must match the track’s voltage and connection system. | Low-voltage operation does not determine brightness by itself. | Confirm track, power supply, and fixture compatibility; do not mix systems based on appearance alone. |
| Track layout | Available in surface-mounted, recessed, and suspended configurations; lengths and connectors vary by system. | Linear, spot, adjustable, and wall-wash fixtures can be positioned along compatible tracks. | Layout and fixture placement affect uniformity and shadowing. | Plan track runs, corners, feed points, ceiling details, and access to the power supply before installation. |
| Power supply capacity | Each system has a maximum supported load, set by the track and its power supply. | Fixture wattages add together to determine the connected load. | Higher wattage does not always mean proportionally higher light output. | Keep the total connected fixture load within the power supply’s rated capacity, following the manufacturer’s guidance. |
| Fixture power | Track capacity varies by system and power-supply configuration. | Small accent fixtures are often around 5–12 W; larger spots and linear modules may use roughly 10–30 W or more. | Compare lumens as well as watts to assess efficiency and brightness. | Choose fixture wattage for the task and verify that the total load suits the system. |
| Luminous flux | Track itself does not produce light; the installed fixtures determine total output. | Small accent fixtures may produce a few hundred lumens; larger fixtures may exceed 1,000 lumens. | Room brightness depends on total lumens, room size, mounting height, surface colors, and light distribution. | Compare fixture lumens and consider a lighting layout rather than selecting by wattage alone. |
| Beam angle | Track placement allows fixtures to be aimed or repositioned in compatible systems. | Spot fixtures commonly offer narrow, medium, or wide beam options, often roughly 15°–60°. | Narrow beams create focused accents; wider beams spread light over a larger area. | Match the beam to the target size and distance; check whether the fixture is fixed or adjustable. |
| Color temperature | Track does not set the light color; this is specified by each fixture. | Common options include warm white (about 2700–3000 K), neutral white (about 3500–4000 K), and cool white (about 5000 K). | Color temperature affects the perceived warmth or coolness of the light, not its brightness. | Choose a consistent color temperature for fixtures used in the same visual area. |
| Color rendering | Not applicable to the track itself. | Many general-purpose LED fixtures have a CRI of 80 or higher; CRI 90 or higher is often preferred where color accuracy matters. | Higher CRI can help colors appear more natural, but does not indicate lumen output. | Check the stated CRI when lighting artwork, merchandise, food, or other color-sensitive subjects. |
| Dimming and control | Control options depend on the power supply and track system. | Fixtures may be non-dimmable or support specific dimming methods. | Dimming compatibility can affect smoothness, minimum brightness, and flicker performance. | Verify that the fixture, driver, power supply, and control method are compatible as a complete system. |
| Installation and safety | Mounting method, wiring, and electrical requirements vary by system and location. | Fixtures should be installed and handled according to their instructions. | Safe operation depends on correct installation and adequate system capacity. | Check applicable electrical codes, indoor or damp-location ratings, and whether installation requires a qualified electrician. |
Selection tip: Start with the room’s lighting purpose, then compare track compatibility, fixture beam and adjustability, lumens, color temperature, and dimming support.
A magnetic track system is only as reliable as its driver, controls, and fittings working together. Confirm the track’s rated voltage and the driver’s output before choosing heads; many systems use 48-volt DC, but components are not automatically interchangeable. Check the adapter’s fit, polarity, maximum load, and the total wattage of every connected light. Then match the control method—such as 0–10V, DALI, or a specified wireless protocol—to both driver and dimmer. A control that fits the wall may still cause flicker or a restricted dimming range.
Efficiency matters, but compatibility comes first. The U.S. Department of Energy’s Energy Saver guidance says LEDs use at least 75% less energy and can last up to 25 times longer than incandescent lighting. Those savings depend on suitable components and use; the figure is not a guarantee for every installation. Check the driver’s minimum and maximum load, dimmer ratings, and any stated flicker performance. One detail that is easy to miss: product diagrams may not show every connector limitation, so written specifications deserve a careful read.
Tips: Before ordering, list each component and verify its voltage, load, connector, and control protocol against the manufacturer’s technical documentation. Ask for clarification when ratings are missing. Keep the answer with your installation records.
Choosing a magnetic track system starts with the ceiling, not the fixtures. Measure the room, note joist positions, and decide where power can enter the track. A neat sketch helps, though the first layout may need changing once you find a beam or duct. Check that the track, power supply, and fittings share the same voltage and connection standard. Confirm the system’s load rating can support every planned light. For recessed or surface-mounted installation, check clearances and fixing points before ordering. Have a qualified electrician handle mains wiring.
Think beyond the installation day. Can you reach the power supply later without removing half the ceiling? Select a track length and connector layout that leave room for likely changes, such as adding a pendant over a dining table. Verify dimmer compatibility; similar-looking controls can behave differently with different drivers. Keep a record of the system’s specifications and save any spare connectors in a labeled box. Small detail, useful later. Dust the track with a dry cloth, and check fittings occasionally for looseness. A more elaborate layout can look flexible on paper but become awkward to maintain. It is worth questioning whether every planned light is actually needed.
sale@harbertpump.com,
sale@harbertpump.com